How to Become a Henna Artist: Step-by-Step Guide
Becoming a henna artist is an exciting journey. It involves creativity and practice.
Henna art is a beautiful and ancient form of body decoration. People across the world admire its intricate designs. The art requires patience, skill, and a keen eye for detail. Many are drawn to henna for its beauty and cultural significance.
It’s more than a hobby; it’s a way to express oneself. The path to becoming a henna artist can be rewarding. You’ll learn the history, techniques, and materials needed. Discover how to create stunning designs that captivate. With dedication, you can transform your passion into a craft. Ready to explore the world of henna art? Let’s dive into the steps needed to start your journey.
Introduction To Henna Art
Henna art is a fascinating journey into the world of intricate designs and cultural beauty. Aspiring artists often find themselves drawn to the delicate patterns and the rich traditions that henna embodies. Becoming skilled in henna application requires patience and creativity. Understanding the basics of henna art is crucial for anyone interested in pursuing this unique form of body art.
History Of Henna
Henna has a long and storied history that dates back thousands of years. It is believed to have originated in ancient Egypt, where it was used for its cooling properties and as a cosmetic. Over time, henna spread to other regions, evolving into a form of artistic expression. Today, henna is celebrated worldwide for its unique henna designs and temporary tattoos. Key historical points include:
- Ancient Origins: Used initially for medicinal purposes and body art.
- Middle Eastern Influence: Henna patterns evolved with cultural exchanges.
- Modern Popularity: Now embraced globally for both traditional henna and contemporary designs.
A table depicting the evolution of henna might look like this:
| Era | Development |
|---|---|
| Ancient Egypt | Cooling and medicinal use |
| Middle Ages | Cultural exchange and intricate designs |
| Modern Day | Global recognition as body art |
Cultural Significance
Henna art holds a deep cultural significance across various societies. It is more than just a temporary tattoo; it is an integral part of many cultural ceremonies and traditions. Henna ceremonies often mark important life events, providing a sense of community and celebration. Some cultural aspects include:
- Weddings: Traditional henna is applied in elaborate patterns during wedding ceremonies.
- Festivals: Henna application is a common practice during festive occasions.
- Rituals: Used to symbolize luck and happiness.
Henna designs are often passed down through generations, with each pattern telling a unique story. Henna training focuses on developing henna skills that respect cultural traditions. This makes henna art not just a skill but a meaningful practice that connects artists with their heritage.

Essential Tools
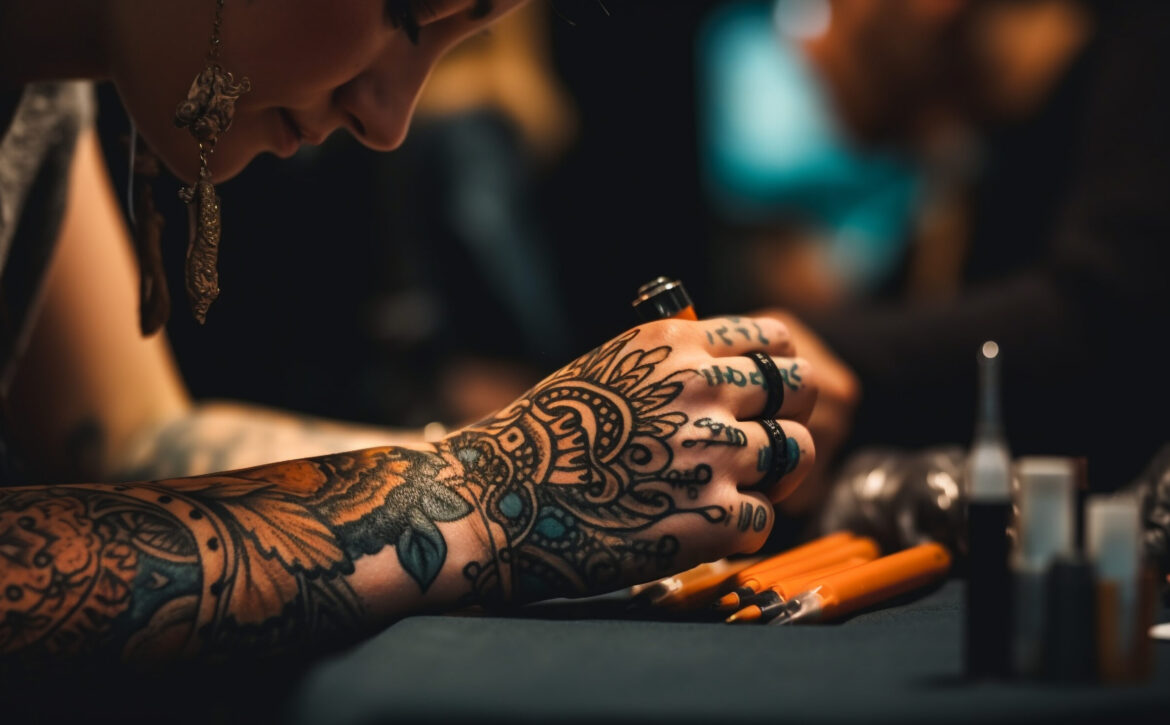
Embarking on the journey to become a skilled Henna Artist requires more than just talent. Having the right tools is essential for creating beautiful and intricate Henna Patterns. Understanding the Essential Tools will set the foundation for your Henna Design skills. These tools include Henna Cones and various Application Tools that ensure precision and safety in your Temporary Body Art journey. Let’s dive into the essentials you need to start your Henna Tattoo Safety practice.
Henna Cones
The Henna Cone is a crucial tool for any Henna Artist. It acts as the applicator for the Henna Paste, allowing for detailed Henna Patterns. Here’s what you need to know about them:
- Henna Cone Preparation: Preparing your cone correctly is vital. A well-rolled cone holds the paste without leaks, ensuring smooth flow.
- Material: Use durable, non-toxic plastic or cellophane to roll your cones. This ensures Henna Tattoo Safety.
- Size: The cone’s size affects precision. Smaller tips allow for intricate designs, while wider tips can cover larger areas quickly.
Here’s a simple table to help you choose the right cone size:
| Tip Size | Use |
|---|---|
| Small | Intricate details and fine lines |
| Medium | General designs and medium lines |
| Large | Filling large areas and bold lines |
Mastering Henna Cone Preparation and Henna Paste Consistency will enhance your Henna Staining Process, resulting in vibrant and lasting designs.
Application Tools
Besides the cone, having the right Application Tools is essential for successful Henna Application Techniques. These tools aid in creating precise and beautiful designs:
- Applicator Bottles: These are an alternative to cones. They offer more control for beginners. Choose bottles with different nozzle sizes for varied Henna Design styles.
- Brushes and Sticks: Use these for blending and shading in larger designs. They help in achieving smooth transitions between patterns.
- Henna Stencils: Perfect for those new to Henna Art. Stencils guide you in creating consistent and symmetrical patterns.
- Protective Gear: Gloves and aprons keep your workspace clean. They also ensure Henna Tattoo Safety by preventing skin contact with raw paste.
Investing in quality Henna Art Tools enhances your ability to create stunning Temporary Body Art. These tools also help maintain the precision and safety needed in your Henna Application Techniques.
Choosing Quality Henna
Becoming a henna artist is a creative and rewarding journey. It involves skill, practice, and an understanding of the materials you use. Choosing quality henna is crucial for creating beautiful and lasting henna designs. Quality henna ensures vibrant color and safe application on the skin. Understanding the types of henna and knowing where to buy them can set you on the right path.
Types Of Henna
There are several types of henna available in the market. Each type offers unique benefits for henna artists:
- Natural Henna: Made from the leaves of the henna plant, it is safe for skin application. It produces a rich reddish-brown color.
- Black Henna: Often mixed with dyes, it’s crucial to check for harmful additives. Pure henna does not naturally produce a black color.
- Neutral Henna: Also known as Cassia, it’s not henna but offers conditioning benefits. It does not color the skin.
Here’s a simple table summarizing the henna types:
| Type | Color | Safety |
|---|---|---|
| Natural Henna | Reddish-Brown | Safe |
| Black Henna | Black | Check Additives |
| Neutral Henna | None | Safe |
Choose your henna based on your artistic needs. For intricate henna designs, natural henna is often the best choice.
Where To Buy
Finding quality henna products is essential for any aspiring henna artist. Here are some options:
- Local Stores: Many health and beauty shops offer henna tattoo kits. Check product labels for ingredients.
- Online Marketplaces: Websites like Amazon and Etsy have a wide range of henna products. Read reviews to ensure quality.
- Henna Workshops: Attending workshops can be a great way to buy quality henna. Experts often sell trusted products.
When buying, consider the following tips:
- Look for fresh henna powder for the best color results.
- Avoid products with artificial dyes for safe henna application techniques.
- Consider purchasing from reputable brands known for quality.
Quality henna makes a difference. It enhances the beauty of your henna designs and ensures safe henna for skin. With the right products, you can create stunning art while maintaining the integrity of your craft.
Basic Techniques
Henna, a temporary body art, captivates with its intricate and beautiful designs. Learning the basic techniques is crucial for anyone aspiring to become skilled in henna application. Whether you are exploring Henna for beginners or want to refine your skills, understanding these techniques will set a strong foundation. Let’s delve into the essentials that can turn your Henna patterns from simple to stunning.
Simple Patterns
Simple patterns are the cornerstone of Henna art. They offer a starting point for those new to Henna tattoos. Begin with basic shapes like circles, dots, and lines. These elements form the building blocks of more complex Mehndi designs. Practice regularly to get comfortable with these shapes. Consistency is key. Consider using bullet points to outline simple pattern ideas:
- Dots: Create dots of varying sizes to add texture.
- Circles: Use circles to form floral motifs.
- Lines: Combine lines to create geometric patterns.
Experiment with these shapes to form unique Henna designs. As you grow confident, start combining shapes to create cohesive patterns. Use a table to explore how different shapes can be combined:
| Shape | Combination | Result |
|---|---|---|
| Dots | Lines | Border designs |
| Circles | Dots | Floral motifs |
Practice these combinations to enhance your Henna techniques. Simple patterns are not just about simplicity; they are the foundation of stunning Henna art.
Line Work
Line work is fundamental in creating detailed Henna designs. It provides structure to your Henna patterns. Mastering line work is essential for crafting intricate Mehndi designs. Focus on steady hands and controlled movements. This will ensure clean lines. Here are some tips to improve your line work:
- Practice regularly: Consistency helps in developing control.
- Vary line thickness: Use different pressure to achieve varying thickness.
- Experiment with angles: Lines at different angles add dynamics.
Use line work to outline and define areas in your Henna design. It can be used to create borders, fill spaces, or add detail. Look at this table for line work ideas:
| Line Type | Usage |
|---|---|
| Straight lines | Borders and outlines |
| Curved lines | Floral and leaf designs |
Line work transforms simple Henna patterns into detailed works of art. With practice, you will see your Henna tattoos evolve into intricate and beautiful designs.
Advanced Designs
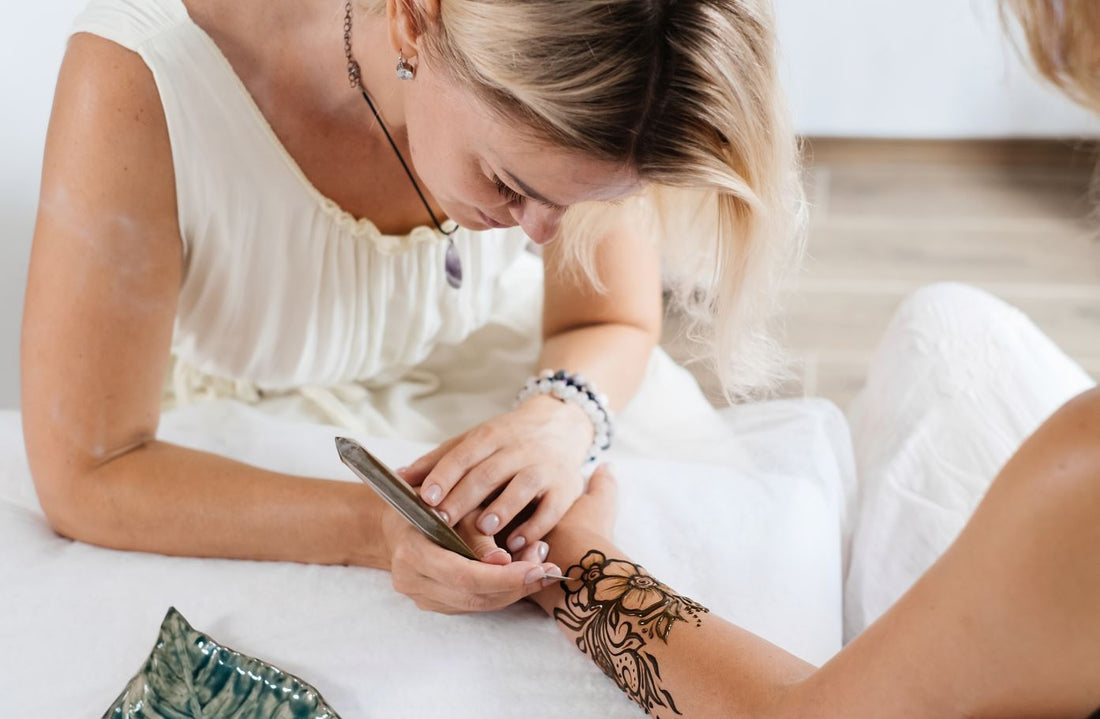
Becoming a skilled Henna Artist involves mastering various Henna Design Techniques. As you grow, you might aim to create Advanced Designs. These designs are more than just beautiful; they reflect the Cultural Significance Of Henna. Advanced Designs require dedication, creativity, and practice. They involve a deeper understanding of Mehndi Applications and Natural Dyeing Methods. Let’s explore two key areas: Intricate Patterns and Custom Designs.
Intricate Patterns
Creating Intricate Patterns is a vital skill for any Henna Artist. These designs are often complex, requiring steady hands and precise Henna Tattoo Skills. Intricate Patterns can transform a simple design into a masterpiece. They are often inspired by traditional motifs and the Cultural Significance Of Henna. Here are some tips for mastering Intricate Patterns:
- Practice regularly: Consistent practice helps improve precision and speed.
- Study Henna Pattern Tutorials: Learning from tutorials can offer new techniques and ideas.
- Observe traditional designs: Many Intricate Patterns come from cultural traditions. Observing these can inspire your work.
- Use quality henna: Good quality henna ensures clear and lasting designs.
Consider this table of popular Intricate Patterns and their origins:
| Pattern | Origin | Description |
|---|---|---|
| Peacock | Indian | Symbol of beauty and grace |
| Mandala | Indian | Represents the universe |
| Floral | Arabic | Delicate flowers and vines |
Mastering these patterns enhances your Temporary Body Art skills. It allows you to offer more detailed and culturally rich Henna Design Techniques.
Custom Designs
Custom Designs set a Henna Artist apart. They involve creating unique designs tailored to individual preferences. Offering Custom Henna Services can attract more clients who seek personalized Temporary Body Art. To excel in Custom Designs, consider these strategies:
- Understand client preferences: Listen to your client’s ideas and preferences.
- Mix traditional and modern elements: Blend classic motifs with contemporary designs.
- Experiment with Natural Dyeing Methods: Different techniques can create varied shades and textures.
- Offer a portfolio: Showcase your past work to inspire clients and build trust.
Custom Designs require creativity and flexibility. They allow you to use your Henna Tattoo Skills to create something unique. Professional Henna Training can further enhance your skills in this area. Custom Designs are more than just art. They are a personal expression for the wearer, reflecting their style and identity. By offering Custom Henna Services, you not only create beautiful art but also connect with clients on a personal level.
Skin Preparation
Henna, a beautiful form of temporary body art, has been cherished for centuries. Many aspire to master this art, whether for personal enjoyment or to offer henna for special occasions. One crucial step in henna application is proper skin preparation. Preparing your skin ensures a vibrant and long-lasting henna stain. Let’s delve into the essentials of skin preparation for henna to achieve stunning results.
Cleaning The Skin
A clean canvas is essential for any art, and the same goes for henna application. Cleaning the skin removes oils and dirt, ensuring that the natural dye adheres well. Here are some simple steps to follow:
- Wash with Soap and Water: Use a mild soap to wash the area. This will remove any oils and sweat.
- Exfoliate: Gently exfoliate the skin to remove dead cells. This helps the henna penetrate better.
- Dry Thoroughly: Make sure the skin is completely dry. Moisture can hinder the staining process.
For those using DIY henna recipes, ensuring the skin is clean is even more important. Clean skin helps the henna mixture bind effectively, resulting in a deeper and more vibrant color. The table below summarizes the key points:
| Step | Action |
|---|---|
| Wash | Use mild soap and water |
| Exfoliate | Gently remove dead skin |
| Dry | Ensure no moisture remains |
Aftercare Tips
Aftercare is vital for henna stain longevity. Proper care ensures that the design stays vibrant for as long as possible. Here are some effective aftercare tips:
- Avoid Water: Keep the area dry for at least 12 hours after application.
- Apply Lemon and Sugar Mixture: Dab a mixture of lemon juice and sugar on the dried henna. This helps to seal the dye.
- Heat Application: Gently heat the area with steam. This enhances the color development.
Henna design techniques often emphasize aftercare. Proper aftercare is part of skin safety tips. It minimizes any potential irritation and maximizes the beauty of the henna. For those offering henna for special occasions, sharing these henna aftercare tips with clients is a good practice. It ensures that their temporary body art remains as beautiful as intended.
Building A Portfolio
Building a portfolio is essential for anyone aspiring to become a Henna Artist. It showcases your Henna Application Skills and helps potential clients see the variety and creativity you bring to your art. A well-curated portfolio is a powerful tool for boosting your Henna Business Tips and Henna Marketing Strategies, allowing your work to shine and attract more clients. Below are some key elements to consider when building your portfolio.
Photography Tips
High-quality photos are crucial for showcasing your Henna Design Techniques. Capturing the intricate details and beauty of your Creative Henna Designs can significantly impact your audience’s perception. Here are some photography tips to enhance your portfolio:
- Lighting: Use natural light whenever possible. It highlights the fine details and enriches the color of the henna.
- Background: Choose a clean, neutral background to avoid distractions. It ensures your designs stand out.
- Angles: Experiment with different angles. Close-ups capture detail, while wider shots show the design’s overall impact.
- Editing: Use editing tools sparingly to enhance clarity and brightness without altering the design.
Consider creating a table to compare different Henna Photography Ideas:
| Setting | Recommended Time | Best for |
|---|---|---|
| Outdoor, natural light | Early morning or late afternoon | Detailed henna designs |
| Indoor, soft lighting | Midday | Simple henna patterns |
Showcasing Work
Once your designs are photographed, displaying them effectively is key. This involves Henna Social Media Promotion and engaging potential clients. Here are ways to showcase your work:
- Create a website: A personal website is ideal for displaying a comprehensive portfolio. Include sections for different design styles and Henna Workshops you’ve conducted.
- Social media: Platforms like Instagram and Facebook are excellent for Henna Client Engagement. Post regularly and use relevant hashtags to reach a wider audience.
- Testimonials: Include client feedback to build trust. Positive reviews highlight your Henna Application Skills and dedication.
- Portfolio updates: Keep your portfolio fresh. Regular updates reflect your growth and adapt to current trends.
Consider utilizing multiple channels to maximize exposure. Each platform offers unique opportunities for Henna Marketing Strategies.
Marketing Your Skills
Becoming a henna artist is more than just mastering henna design techniques. It involves marketing your skills effectively to reach a wider audience. To promote henna services successfully, it’s essential to leverage various marketing strategies. These include using social media platforms and engaging in networking opportunities. These strategies help in building a strong presence, attracting clients, and growing your business.
Social Media Strategies
Social media is a powerful tool for promoting your skills as a henna artist. Social media marketing for henna involves creating and sharing content that highlights your unique henna application methods and designs. Here’s how you can use social media effectively:
- Build A Henna Portfolio: Use platforms like Instagram and Pinterest to showcase your work. Post high-quality images of your designs to attract potential clients.
- Engage With Followers: Respond to comments and messages promptly. This engagement builds relationships and encourages more interaction.
- Share Henna Trends: Keep your audience updated with the latest trends in henna art. Sharing trends can position you as a knowledgeable henna artist.
Consider creating a content calendar to plan your posts. Regular posting keeps your audience engaged and your services top of mind. Using stories and reels can also highlight your henna application methods in a dynamic way, attracting more viewers and potential clients.
Networking Opportunities
Networking is crucial for any henna business. It helps you connect with other professionals and potential clients. Here are some effective networking opportunities:
- Henna Workshops: Attend or host workshops to meet other henna enthusiasts. This can lead to collaborations and referrals.
- Join Henna Communities: Participate in online forums and groups related to henna. Sharing advice and insights can establish you as an expert in the field.
- Collaborate With Local Businesses: Partner with beauty salons, event planners, or wedding coordinators to offer your services. This can expand your client base significantly.
Networking for henna professionals also involves attending trade shows and local events. These platforms offer a chance to display your work and connect with industry peers. Building relationships with other artists can lead to learning new henna design techniques and business tips that enhance your skills and business growth.

Frequently Asked Questions
Do You Need A License To Do Henna?
Most places don’t require a license for henna application. Check local regulations for specific requirements. Some areas may need a cosmetology license. It’s essential to ensure safe practices and use approved henna products. Always stay informed about your area’s laws to avoid any legal issues.
How Much Does A Henna Artist Make?
A henna artist can earn between $25 to $150 per hour. Earnings depend on location, experience, and demand. Part-time artists might make less, while popular artists with unique designs can charge higher rates.
Do You Need A Qualification To Do Henna?
No formal qualification is needed to apply henna. However, training can improve skills and knowledge. Always practice safe and hygienic methods to ensure client safety. Check local regulations as requirements may vary. Understanding skin reactions and allergies is essential for safe henna application.
How Long Does It Take To Be A Henna Artist?
Becoming a henna artist typically takes a few months to a year. This depends on practice and skill development. Consistent practice and learning different designs enhance proficiency. Online courses and workshops can speed up the process. Dedication and passion significantly contribute to mastering henna art effectively.
Conclusion
Embarking on a henna journey requires patience and practice. Start small, grow big. Focus on learning basic designs first. Experiment with different styles and techniques. Build confidence with each new design. Connect with henna communities online and offline. Share your work to gain feedback and inspiration.
Enjoy the creative process. Celebrate your progress, no matter how small. Keep practicing to refine your skills. Henna artistry is a rewarding experience. With dedication, you can achieve beautiful results. Embrace the journey and let your creativity flourish. Henna art awaits you.